
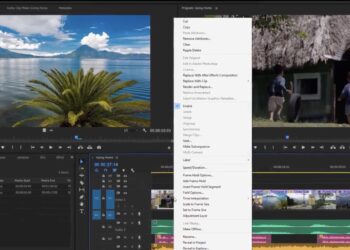
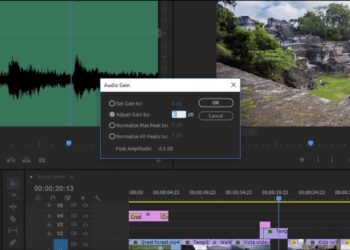
To create a more nuanced mix of sounds, use keyframes to vary the volume over time. A keyframe is a special marker that contains a setting (volume in this case).
- In the Timeline panel’s Settings menu, make sure Show audio keyframes is checked. You may need to increase the height of the audio track to see the keyframes of the audio clip.
- Select the Pen Tool.
- Click the thin white line in the audio clip to add a new keyframe marker.
- Drag the keyframe up to make the sound louder, and drag it down to make it quieter.
- Drag the keyframe left or right to apply the settings forward or backward.
- To delete a keyframe, select it and press Backspace (Windows) or Delete (macOS).
- The Pen Tool lets you lasso multiple keyframes to move or delete them all at once. These types of keyframes are added to clips, not tracks (you can also add keyframes to tracks).
- When you are done working with keyframes, select the selection tool.
Related Links:


